
Visual guide
How to Create an XDelta Patch on Android Using UniPatcher
Create an XDelta patch from an original source file and your modified version, then save the new patch to Android storage.
An XDelta patch records the differences between an original file and a modified copy. It lets you share those changes without packaging the complete game file. Put the original and modified versions in the correct fields, since reversing them would describe the opposite transformation.
Preparation
Understand the three file fields
The labels describe different stages of the same file, not interchangeable inputs.
- Source file
- The original or base file before your modifications were made.
- Modified file
- The changed copy containing everything you want the patch to represent.
- Patch file
- The new
.xdeltaoutput that UniPatcher will generate.
Step 1
Open the Create patch screen
Check the current screen
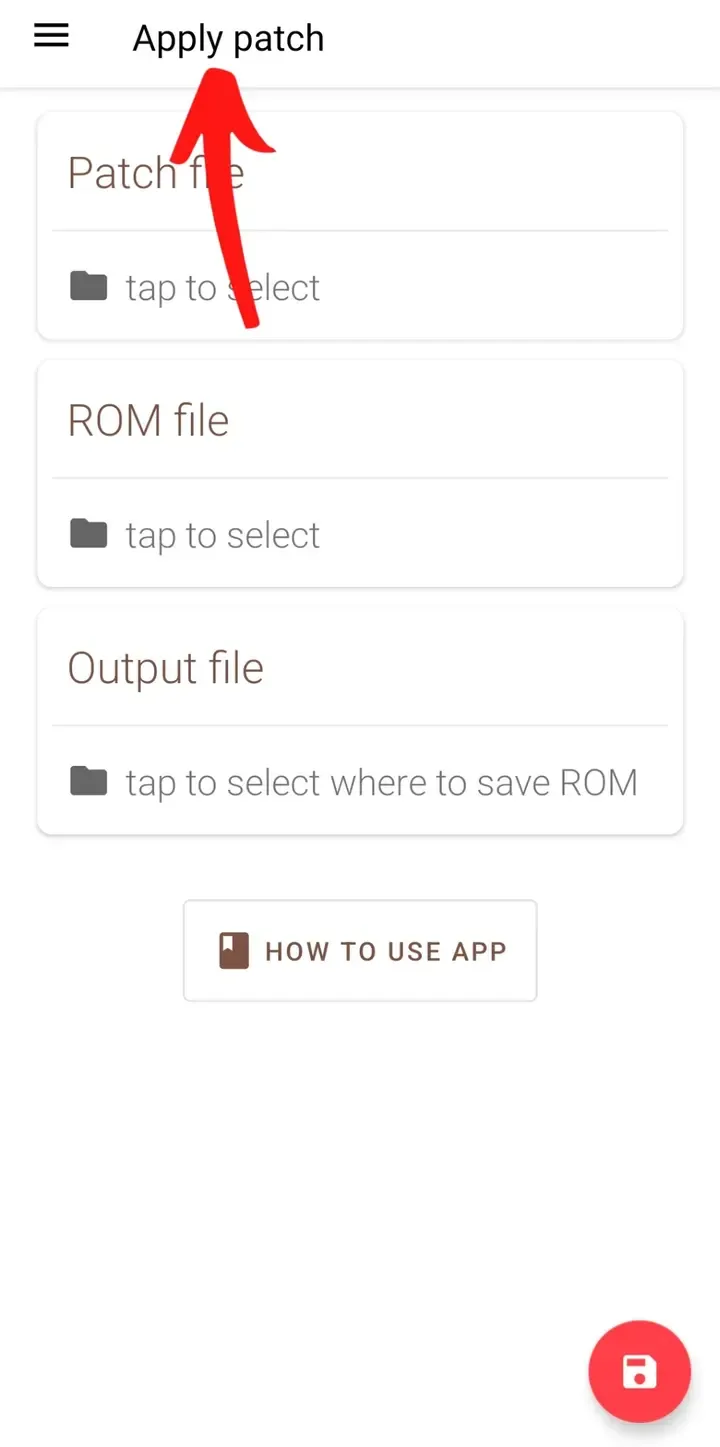
UniPatcher normally opens on Apply patch. Check the heading at the top before opening the navigation drawer.
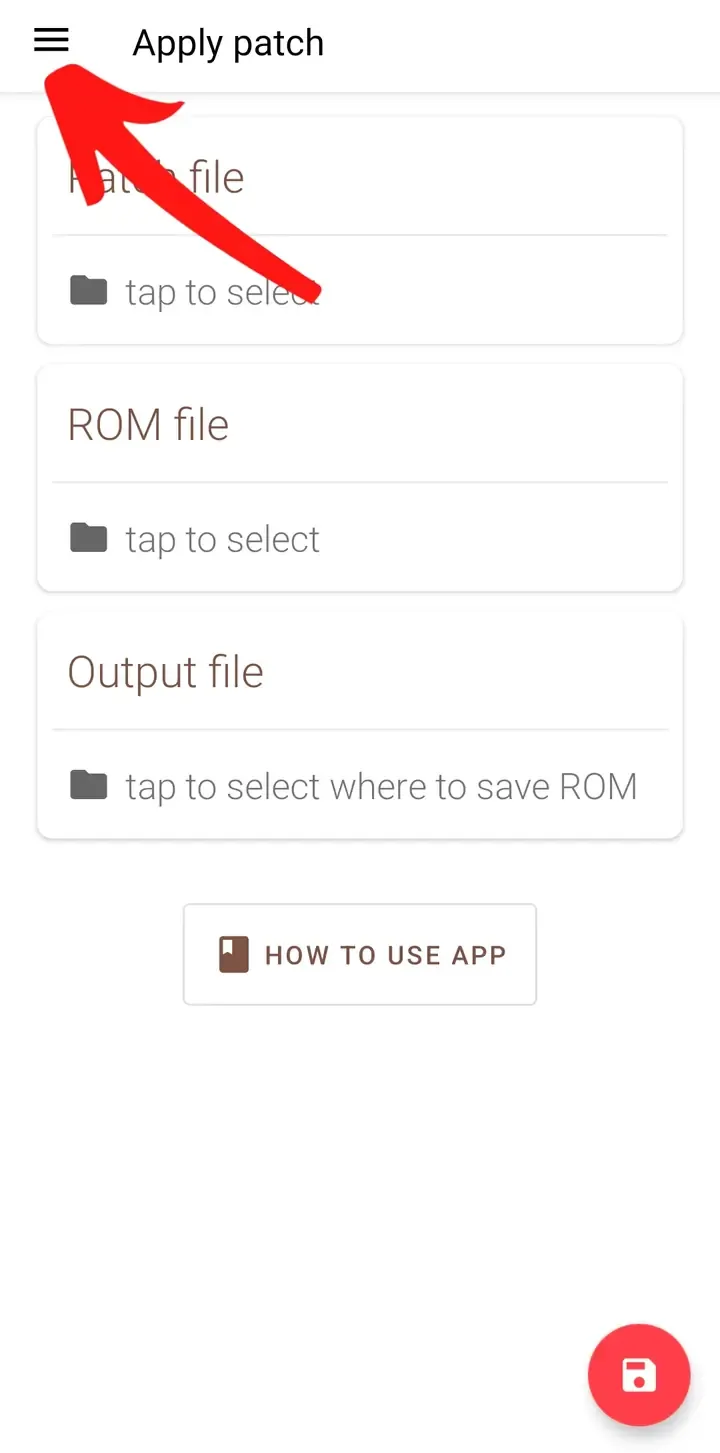
Open the navigation drawer
Tap the three-line menu icon in the upper-left corner. This opens UniPatcher's navigation drawer.
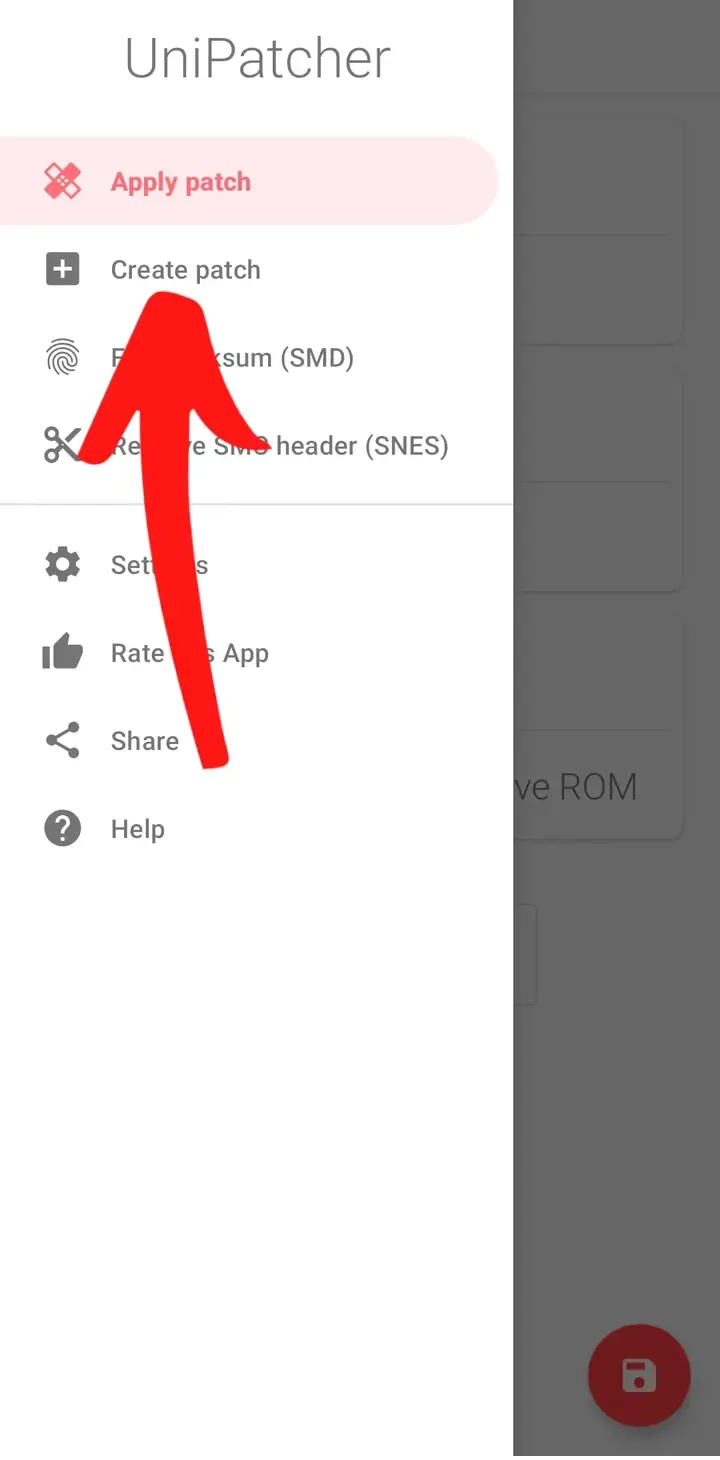
Choose Create patch
In the navigation drawer, tap Create patch. Do not choose Apply patch, which is the screen you are leaving.
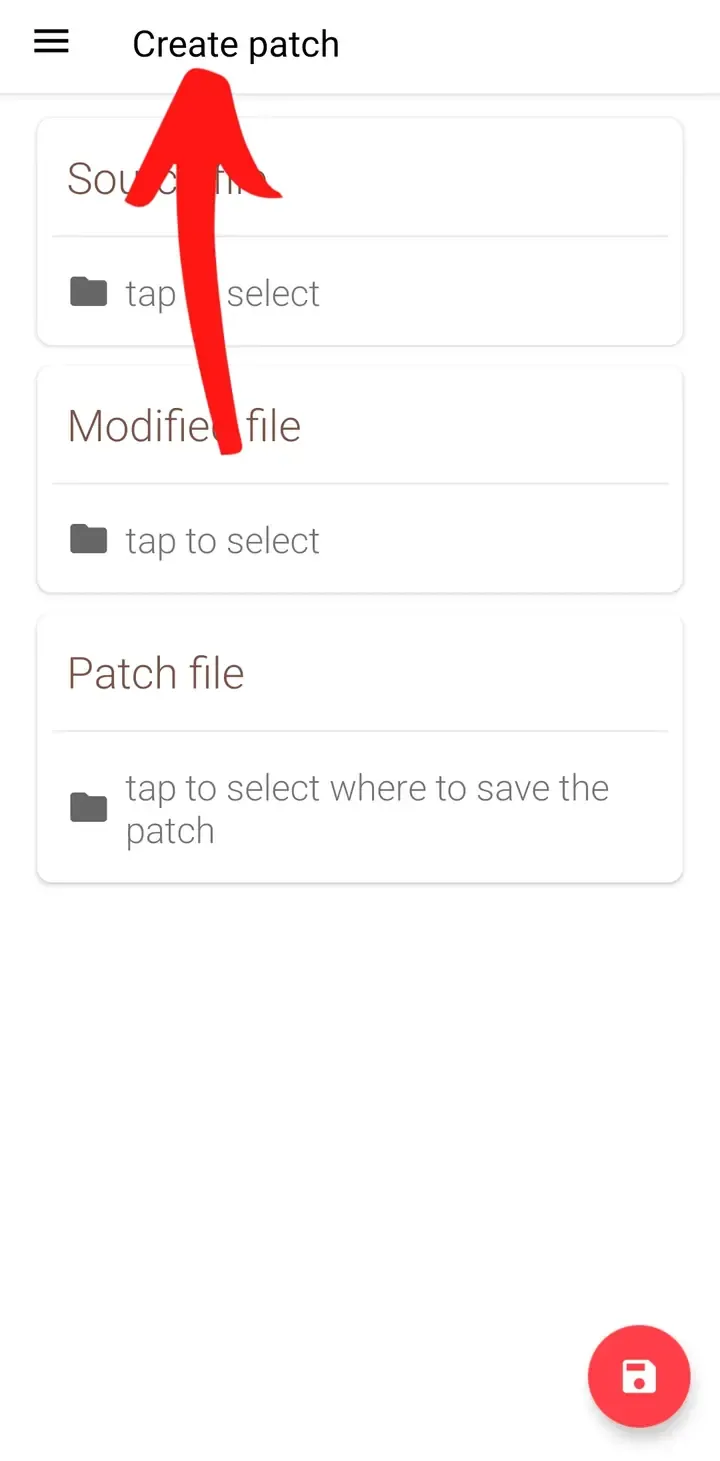
Confirm the Create patch screen
Check that the heading now reads Create patch. The screen should contain Source file, Modified file and Patch file.
Step 2
Select the original source file
Source file means the unchanged original before your modifications were made. Use the exact file from which your modified version was created.
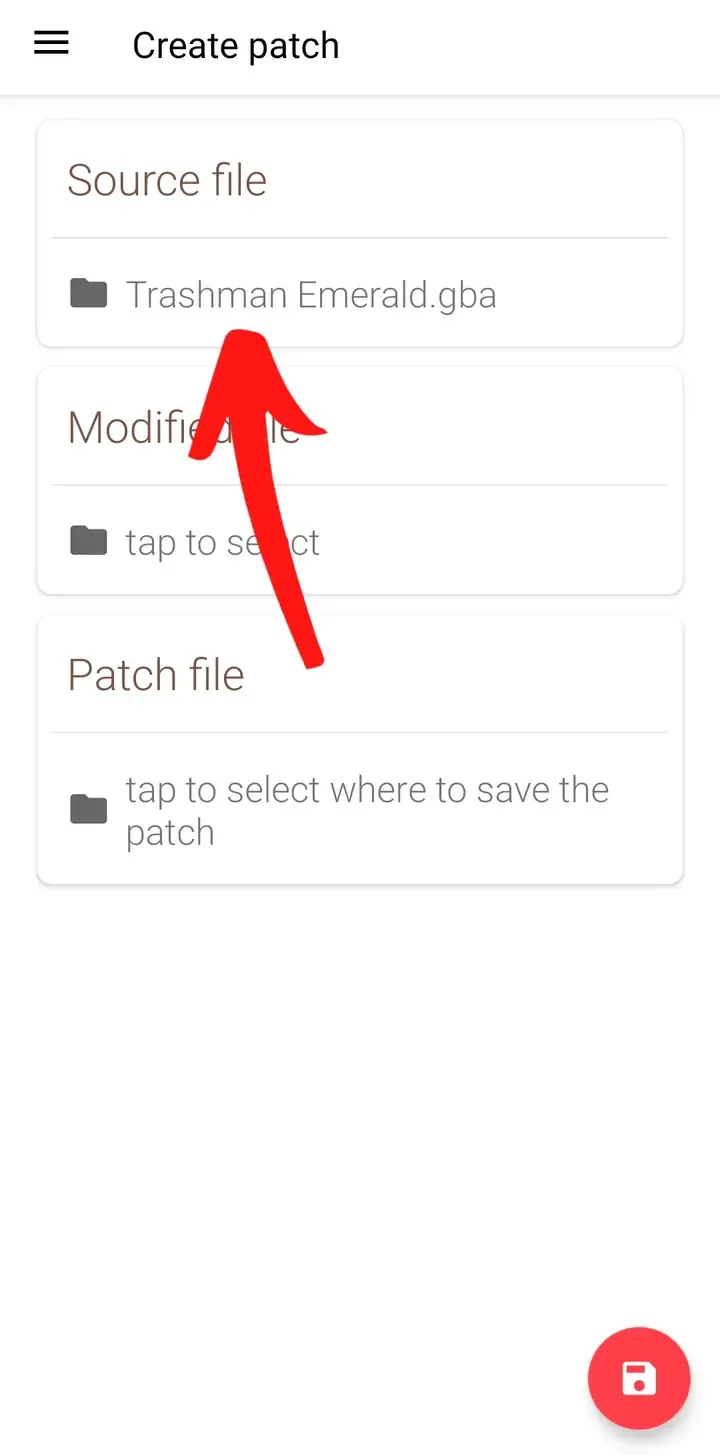
The screenshots use Trashman Emerald.gba only as an example; your source filename will depend on your own project.
Tap the Source file selector
Tap tap to select beneath Source file. Android's file picker will open.
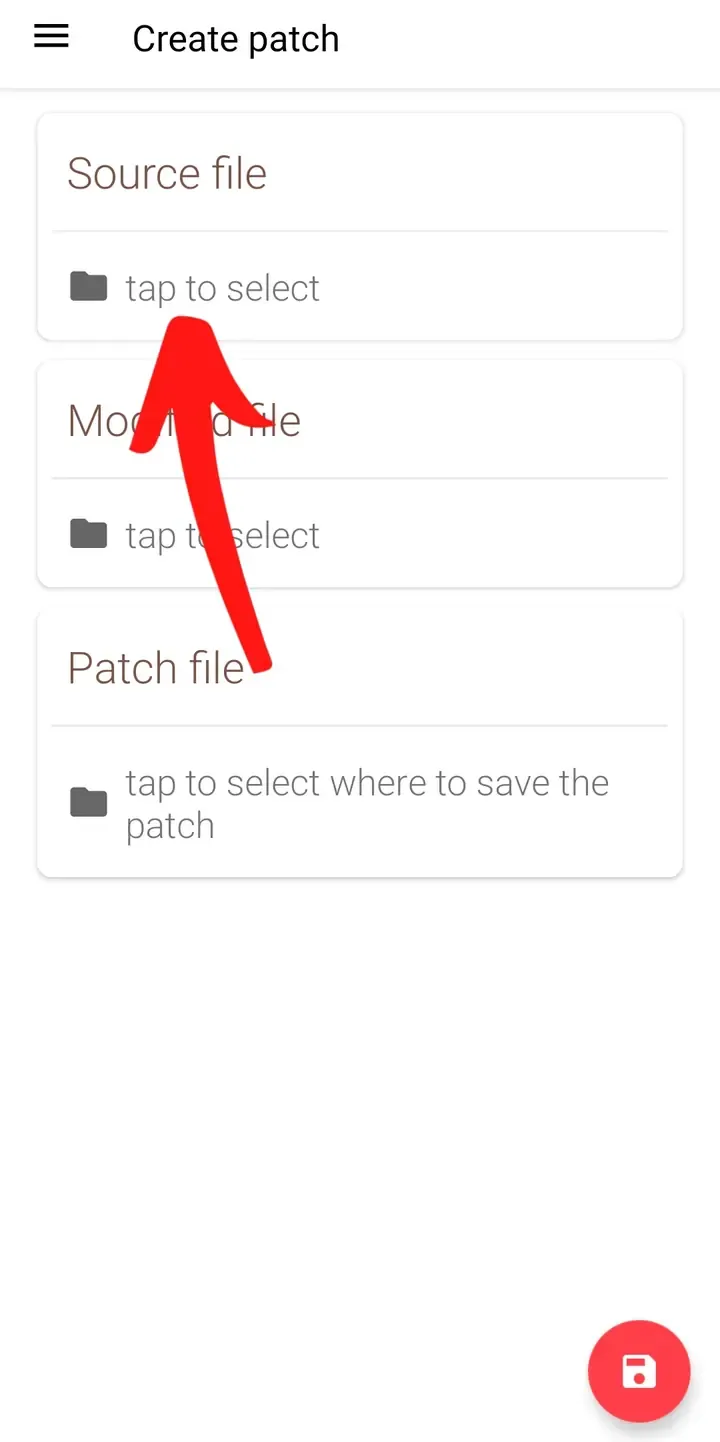
Choose and confirm the original file
Select the unchanged original. When UniPatcher returns, confirm that its filename appears beneath Source file.
Step 3
Select the modified file
Modified file is the changed version containing everything you want the XDelta patch to represent.
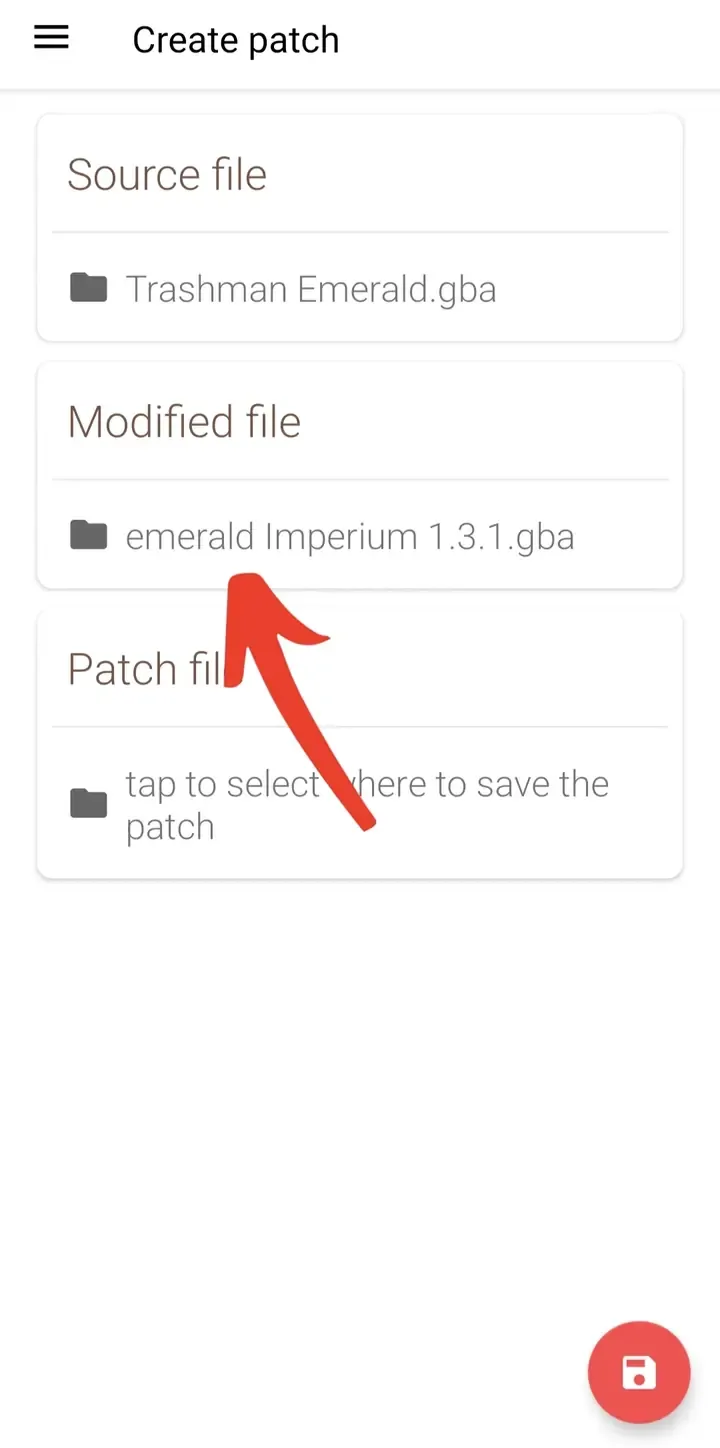
The example displays an Emerald Imperium file only to demonstrate the interface. UniPatcher compares the files you provide; it does not supply them or determine whether the modified version contains the changes you intended.
Tap the Modified file selector
Tap tap to select beneath Modified file to open Android's file picker.
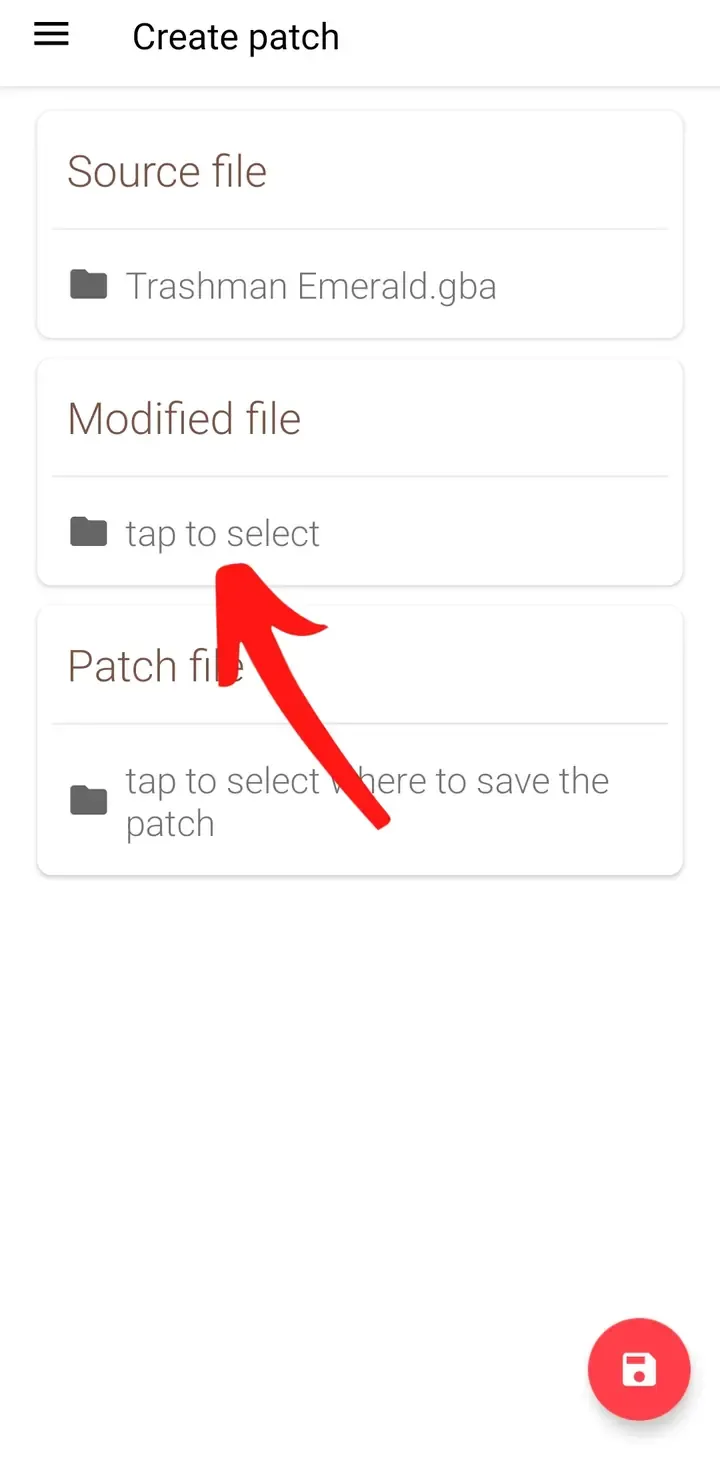
Choose and confirm the modified file
Select the changed copy. When you return to UniPatcher, verify that its filename appears beneath Modified file and that the original remains in Source file.
Step 4
Choose where to save the XDelta patch
Patch file is the new .xdelta output that UniPatcher will generate. It records the differences between the source and modified files.
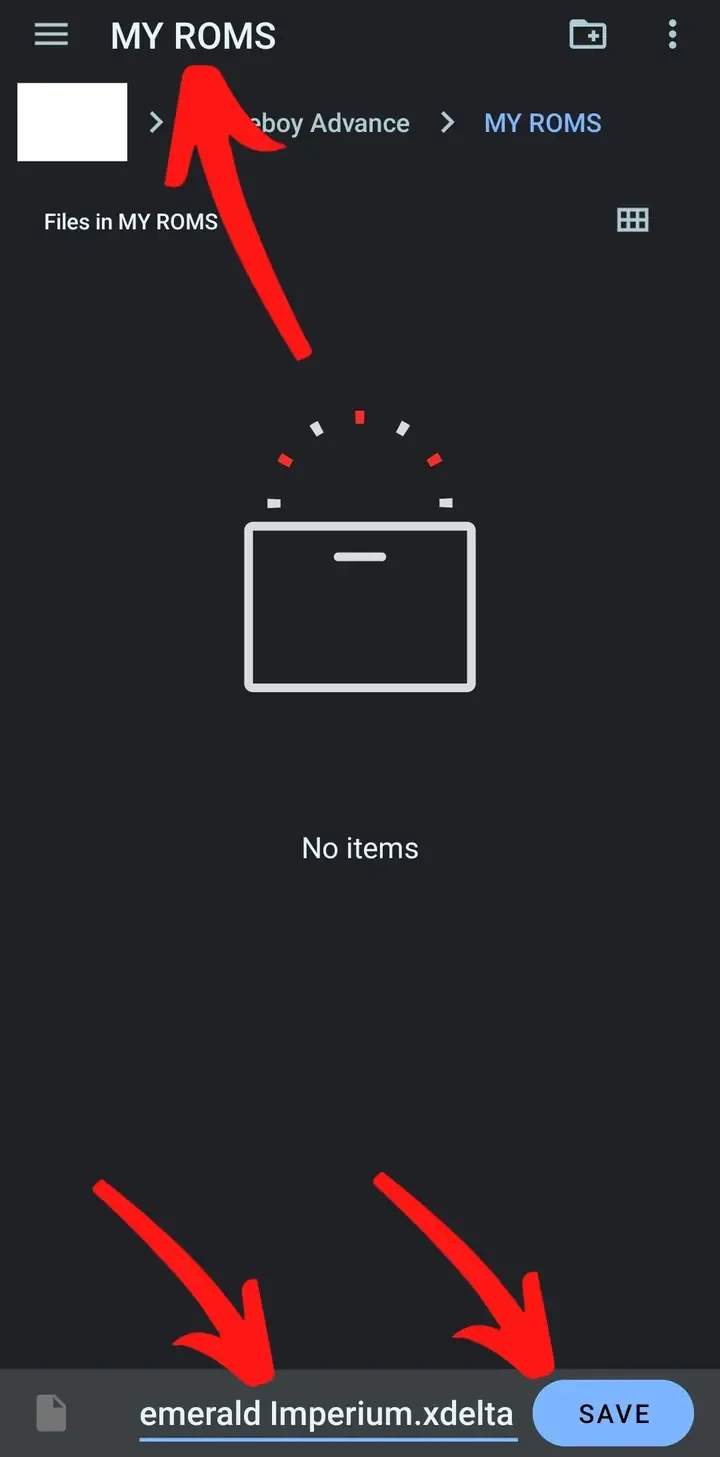
Choose a name that identifies the project and version without implying that the patch contains the complete game. The screenshots use emerald Imperium.xdelta as an example destination.
Open the Patch file selector
Tap tap to select where to save the patch beneath Patch file.
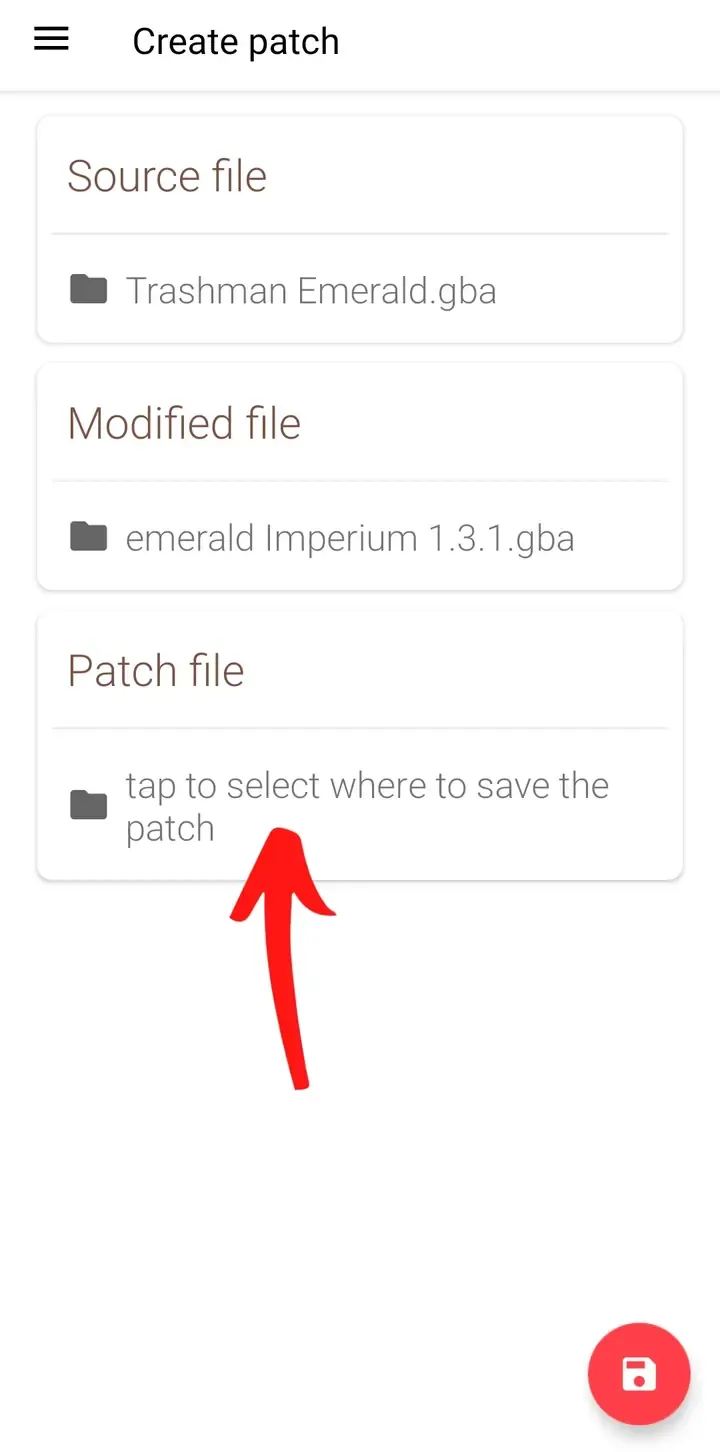
Name and save the XDelta file
In Android's save interface, choose a folder, enter a useful filename ending in .xdelta, and tap Save.
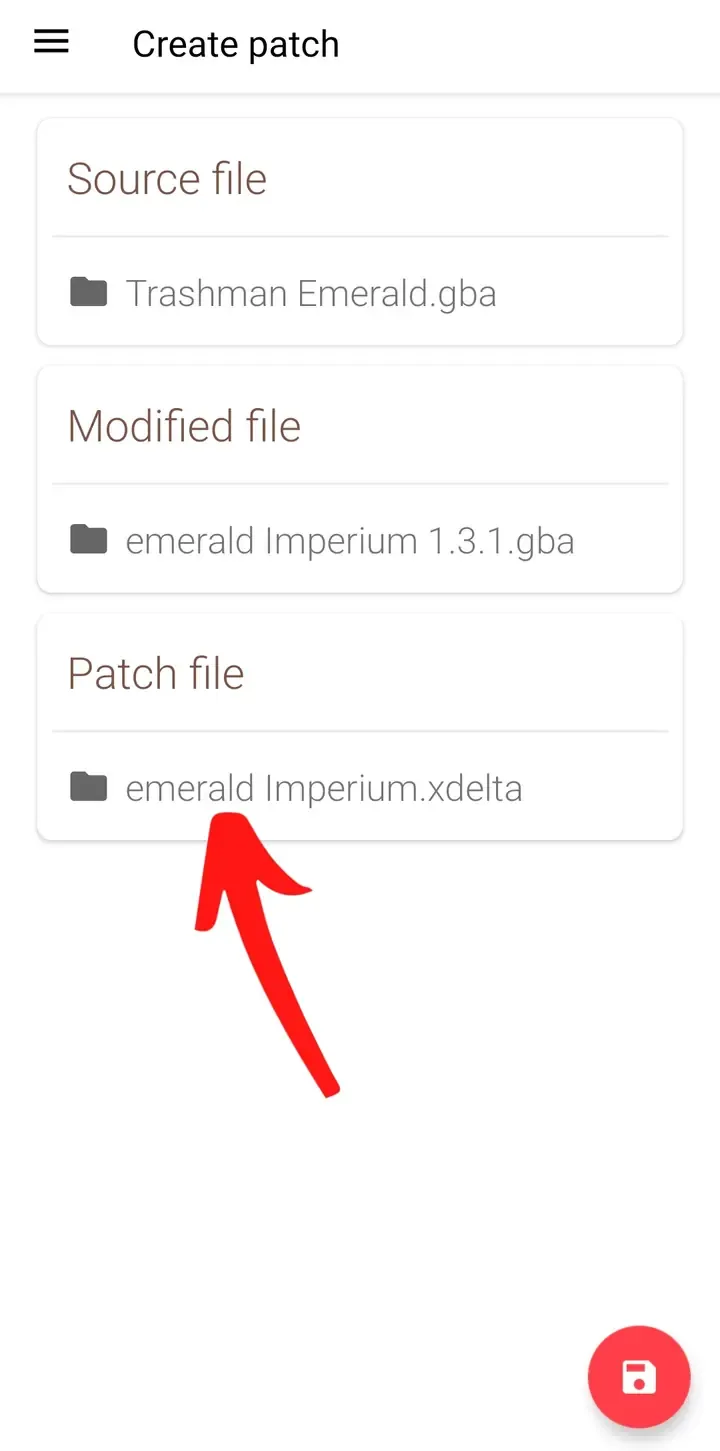
Confirm the patch destination
When UniPatcher returns, check that the new .xdelta filename appears beneath Patch file.
Step 5
Create the XDelta patch
Review the three fields one last time: unchanged original in Source file, changed copy in Modified file, and a new .xdelta destination in Patch file.
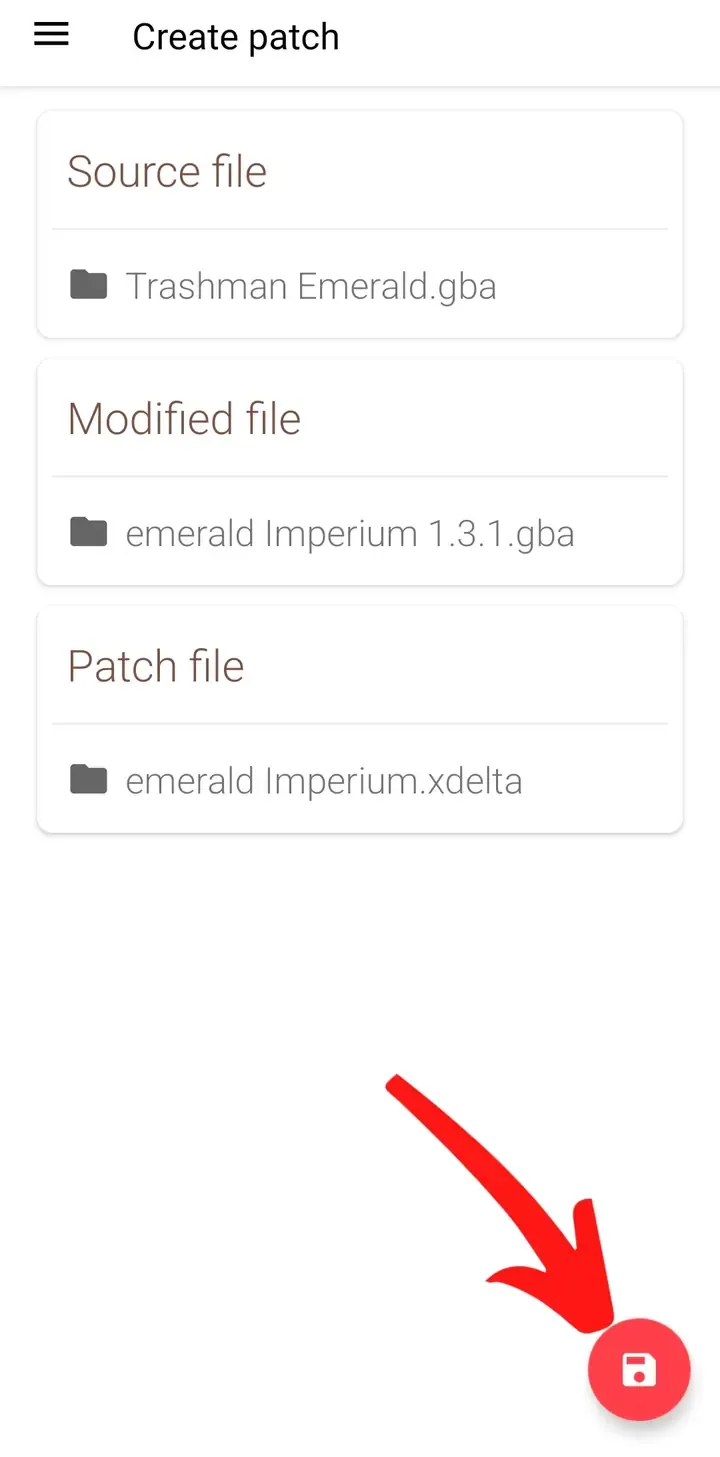
Tap the red action button
Tap the red round action button in the bottom-right. Keep UniPatcher open while it compares the files and writes the patch; larger files or slower storage may take longer.
Step 6
Confirm that the patch was created
Wait for the confirmation message
Keep the app open until Patch created appears. This message confirms that UniPatcher wrote the new XDelta file to your selected location.
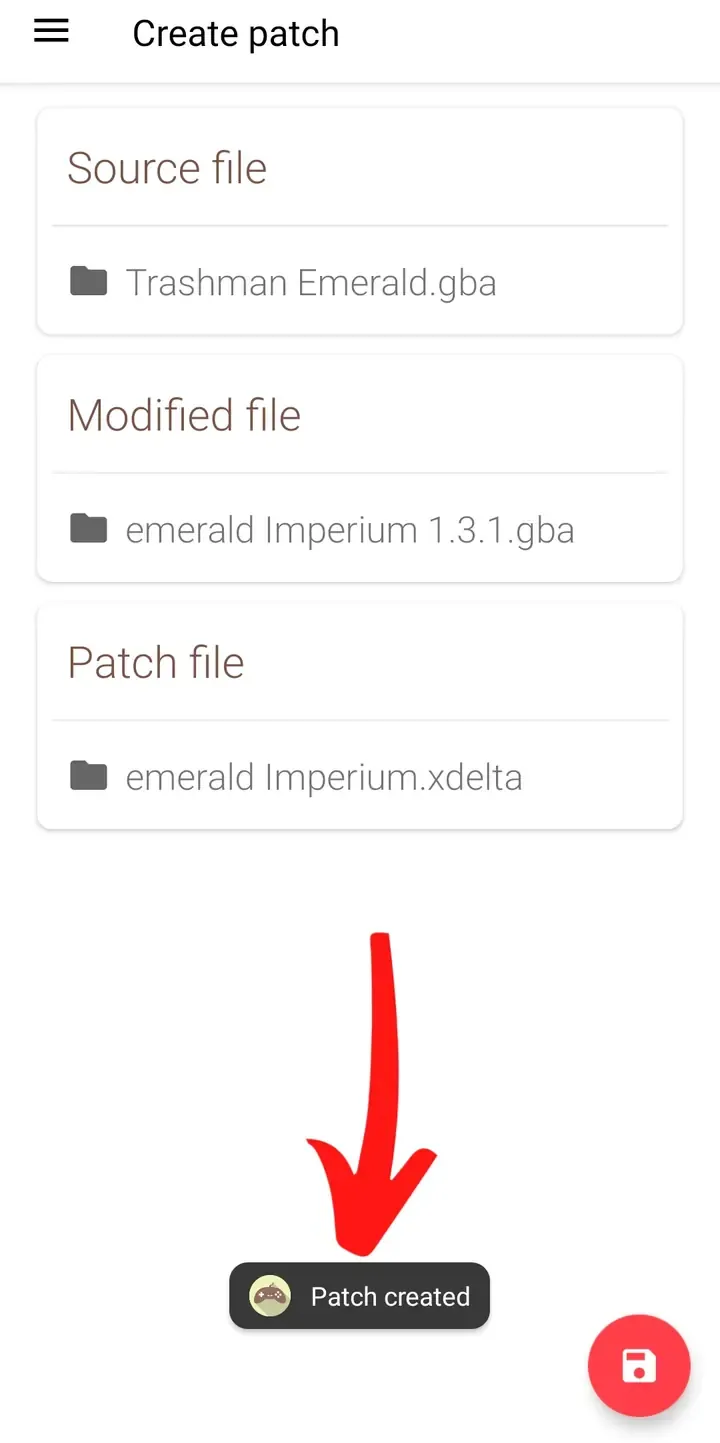
The .xdelta file can now be distributed separately from the game and applied to the correct compatible source file.
Before sharing it, test the patch against a clean copy of the same source file. A successful test checks that someone starting with the documented original can reproduce your modified result.