
Visual guide
How to Patch a ROM on Android Using UniPatcher
Follow the complete Apply patch workflow: choose a patch, select its compatible base ROM, name the new output file and run the patch on Android.
UniPatcher combines a patch file with the original ROM expected by that patch. It then writes the result to a separate output file. The patch does not contain the complete game, and selecting a ROM with the right title but the wrong region or revision can still produce an error or unusable result.
Preparation
What you need before you start
Prepare the inputs first so you do not have to interrupt the patching process.
- UniPatcher installed. If needed, review the current download options.
- The extracted patch file. A file inside ZIP, RAR or 7Z storage must be extracted before you select it.
- The correct base ROM. Use the exact region, revision and header state named by the patch creator.
- Free storage space. UniPatcher needs room to create a separate patched output.
Step 1
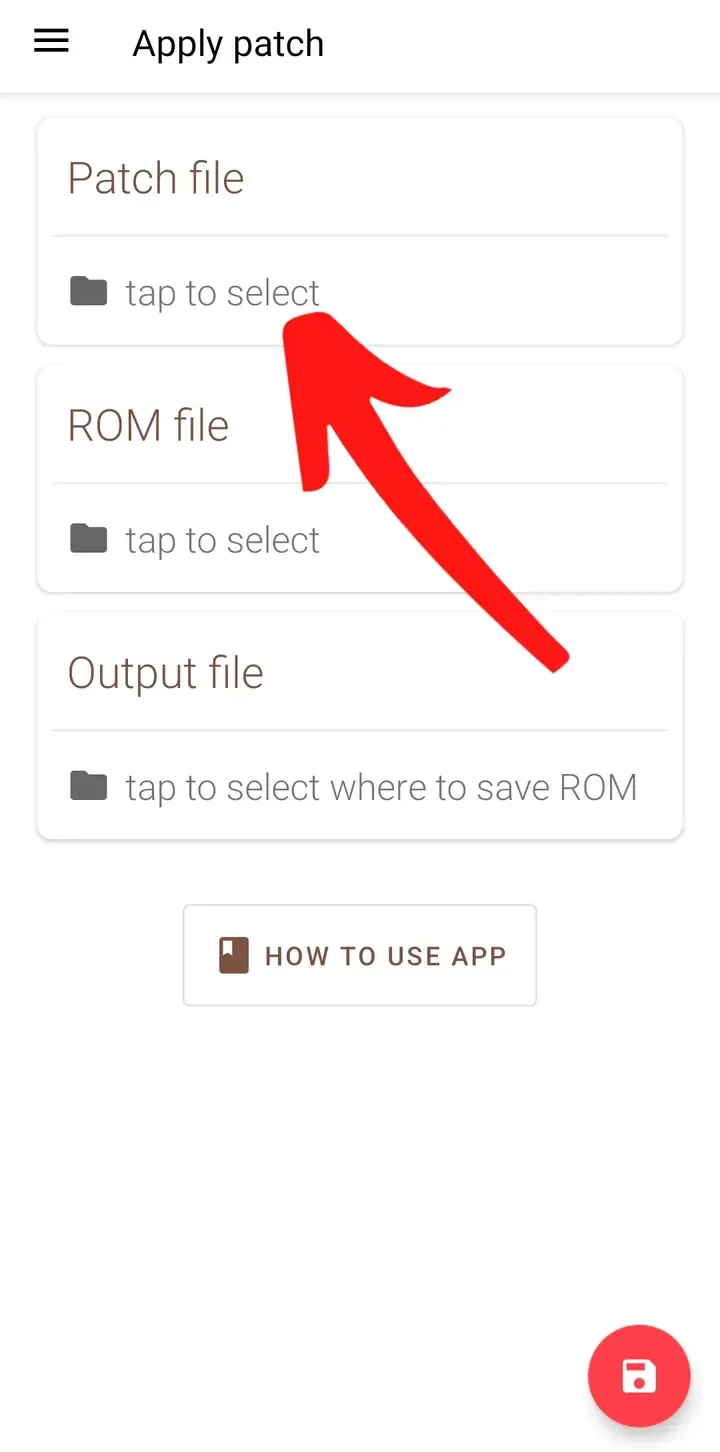
Open Apply patch and select the first field
Open UniPatcher and check that the heading reads Apply patch. The first field accepts the patch containing the changes you want to apply.
What is a patch file?
A patch stores the differences to apply to a compatible original file. Depending on the project, those differences can add a translation, fix bugs, alter graphics or introduce other changes. It is not a complete copy of the game. UniPatcher can apply IPS, IPS32, UPS, BPS, APS (GBA), APS (N64), PPF, DPS, EBP and XDelta3 patches. The supported-format notes explain why changing a filename extension does not convert a patch.
Tap the Patch file selector
Tap tap to select beneath Patch file. Android's file picker will open so you can browse your storage.
Step 2
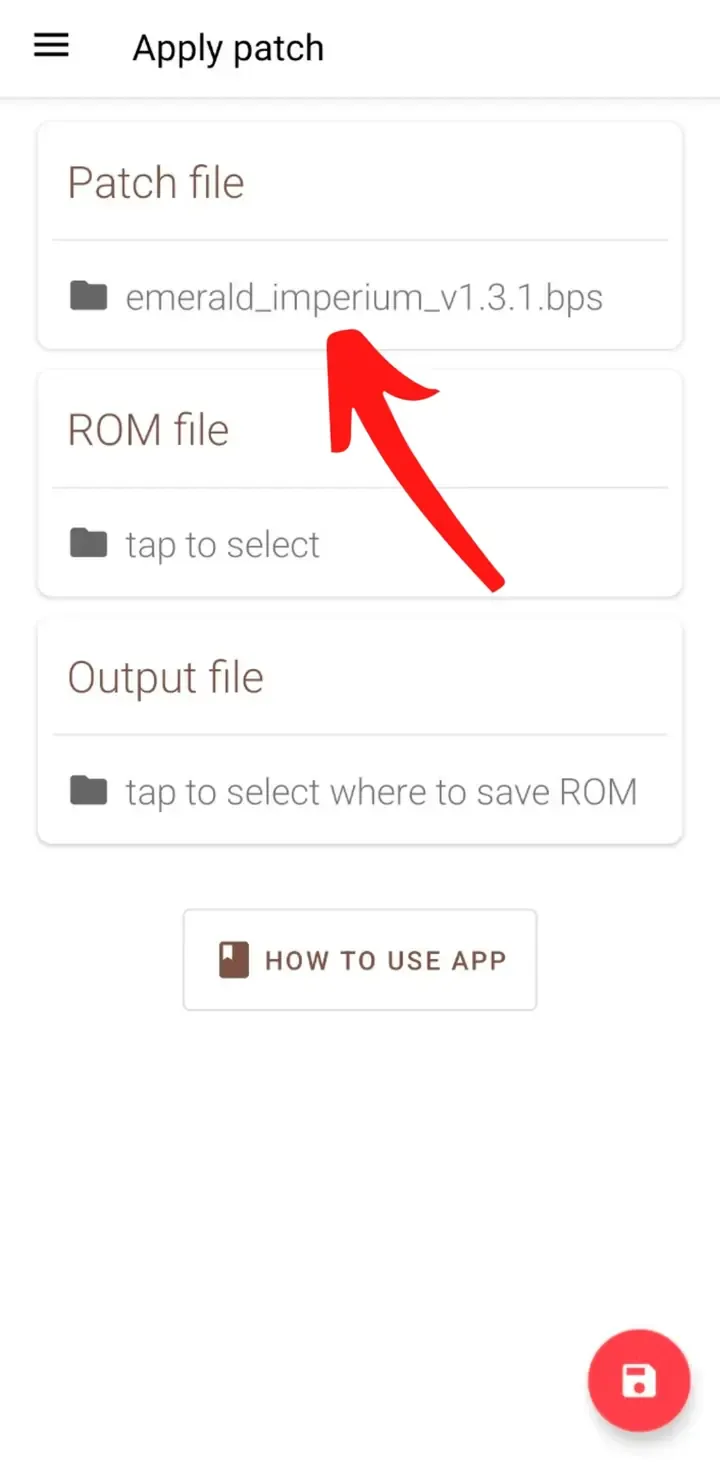
Choose and confirm the patch file
The screenshot example uses emerald_imperium_v1.3.1.bps. Your filename and patch format will depend on the project you are following.
Choose the extracted patch
Choose the extracted patch file. When UniPatcher returns, confirm that its filename appears beneath Patch file before continuing.
Step 3
Select the compatible ROM file
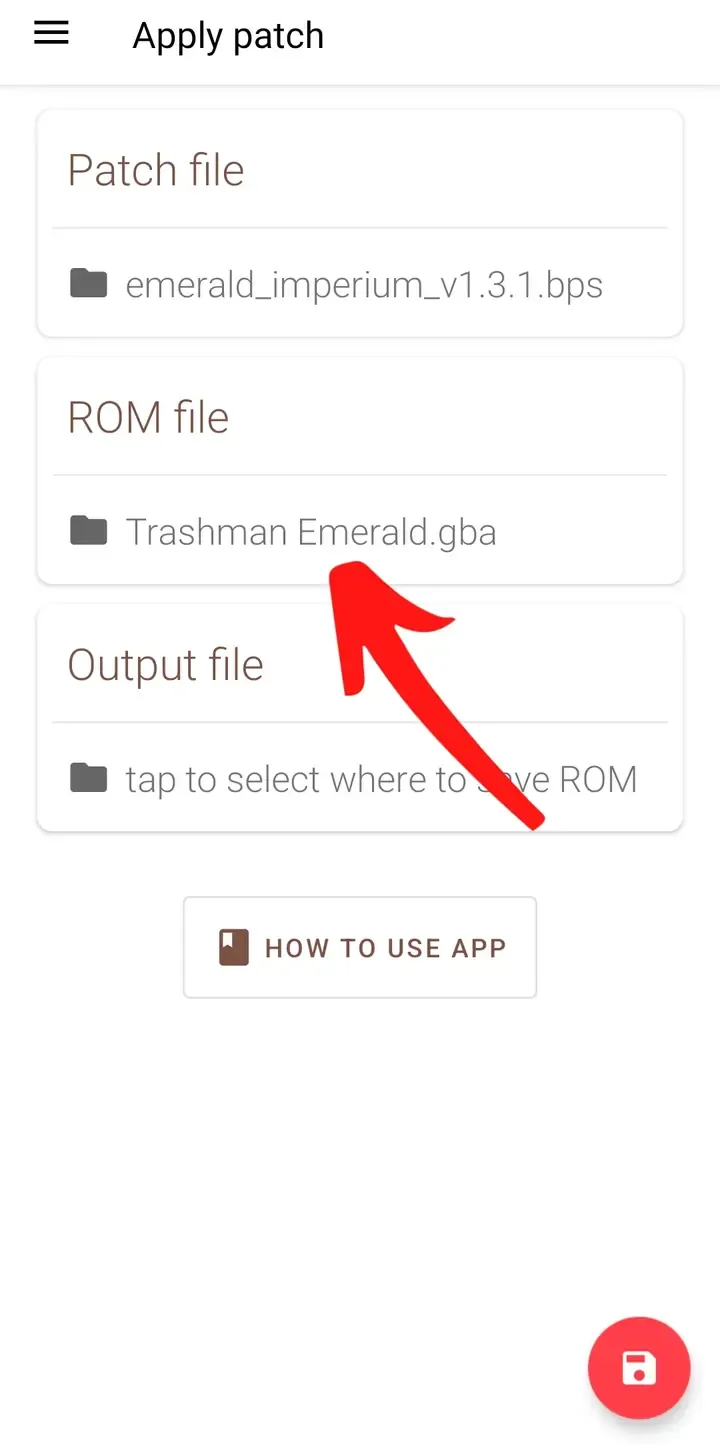
ROM file means the unchanged base ROM required by the patch. The images use Trashman Emerald.gba only as a workflow example.
Compatibility matters: a patch may require a particular release, language, revision, checksum or header state. A ROM for the same game is not automatically the correct source.
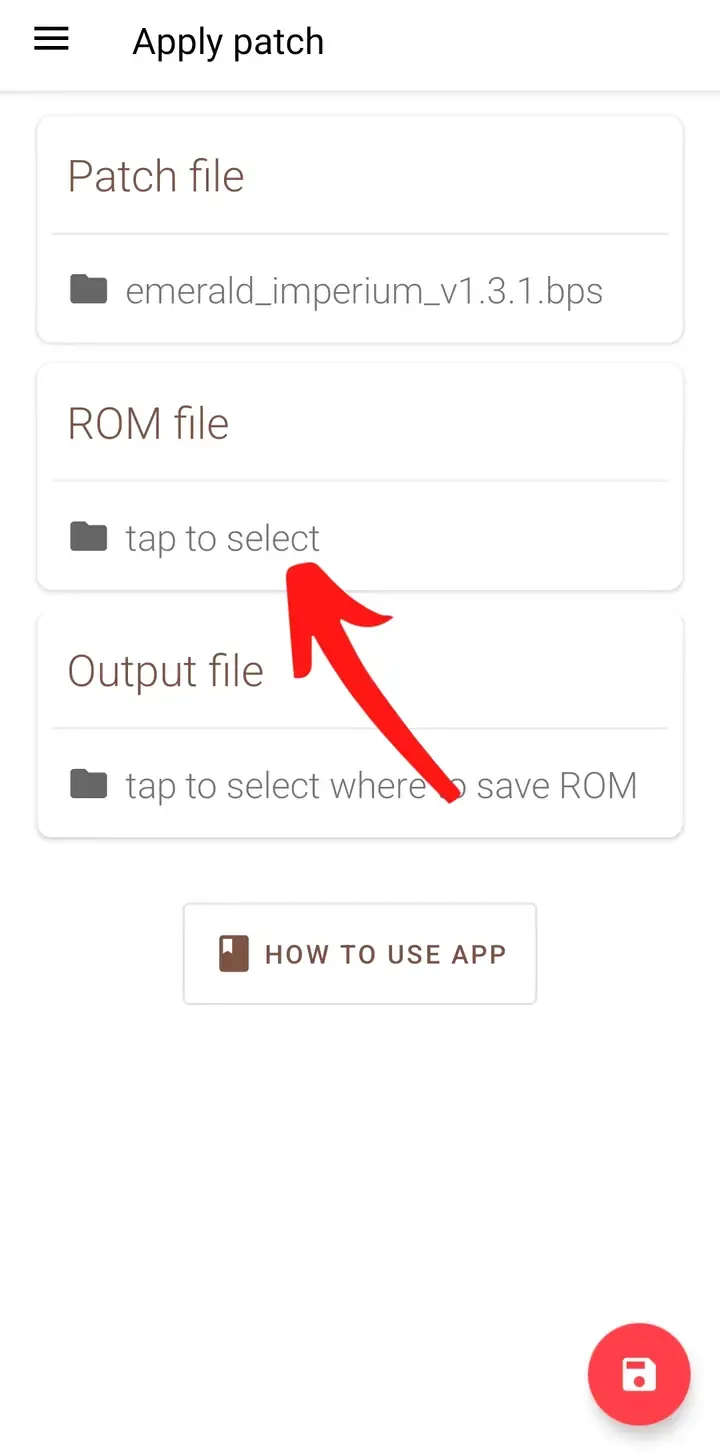
Tap the ROM file selector
Tap tap to select beneath ROM file to open Android's file picker.
Choose and confirm the base ROM
Select the compatible original ROM specified by the patch creator. When the app returns, check that the correct filename appears beneath ROM file.
Step 4
Choose the output filename and location
The output is a new patched game file. It is different from both inputs: the patch supplies the changes, the base ROM supplies the original data, and the output is the result you later open in a compatible emulator.
Open the Output file selector
Tap tap to select where to save ROM beneath Output file. Android's save interface will open.
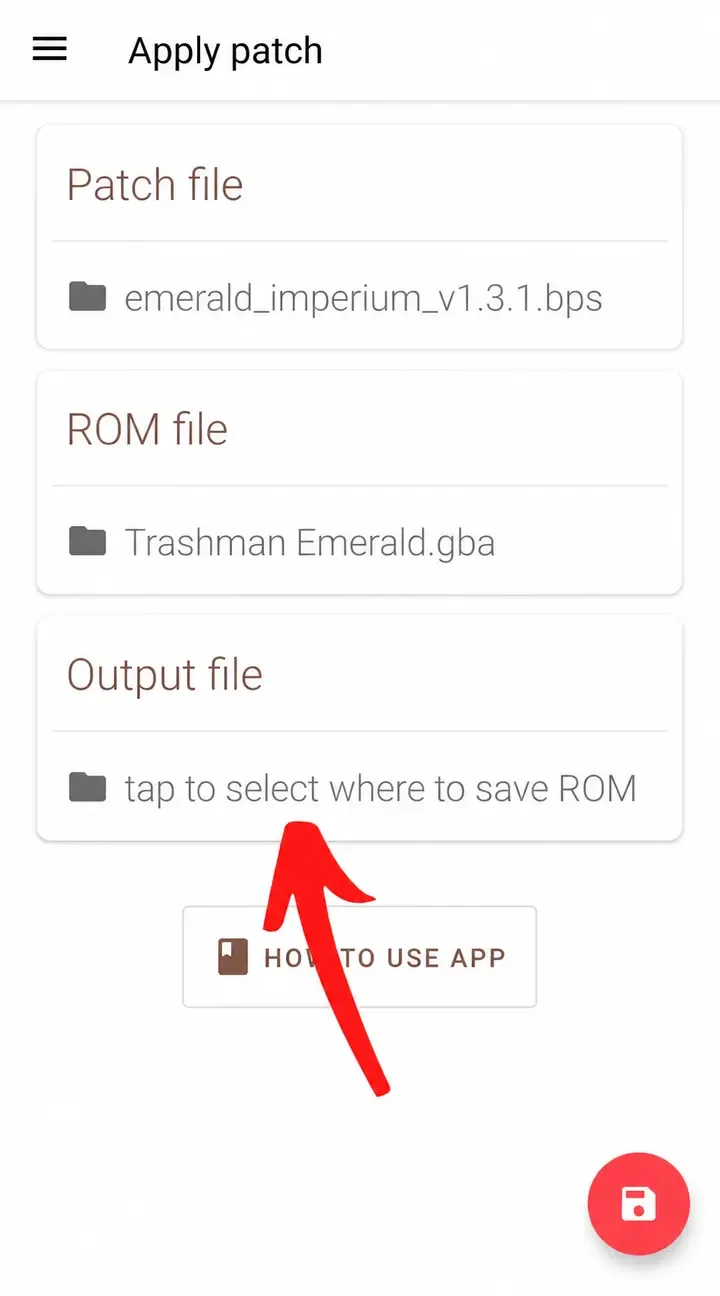
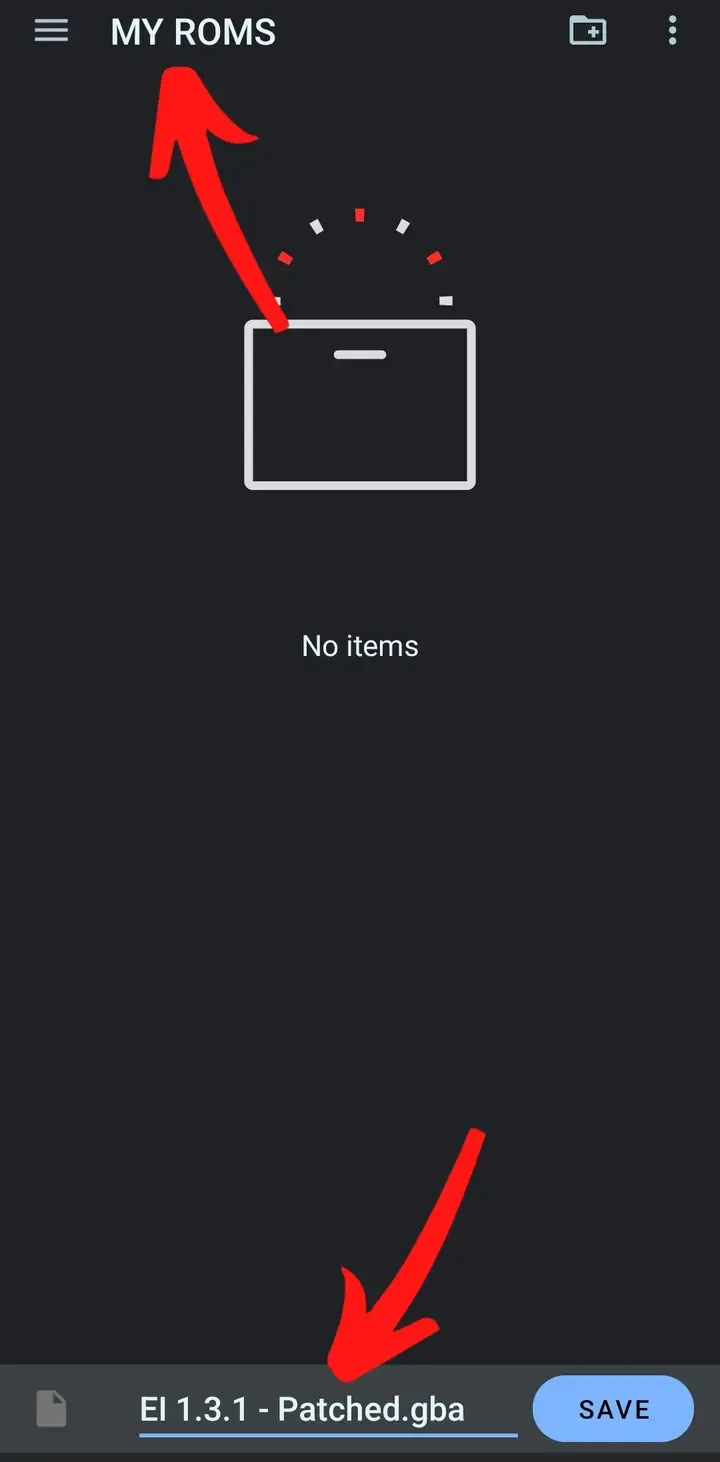
Name and save the patched ROM
Choose a destination folder, enter a clear filename with the correct ROM extension, then tap Save.
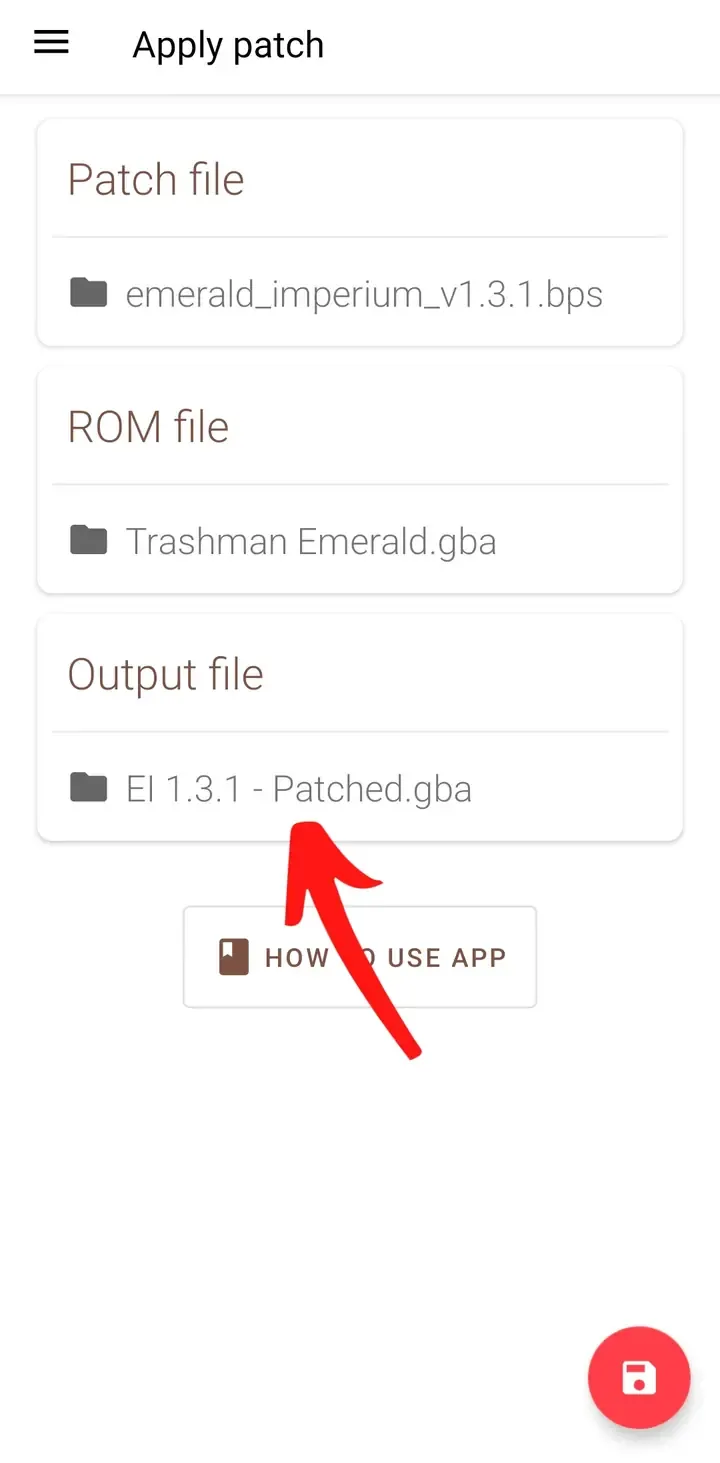
Confirm the output destination
After UniPatcher returns, verify that the new filename appears beneath Output file. It should be a separate destination, not either input file.
Step 5
Apply the patch
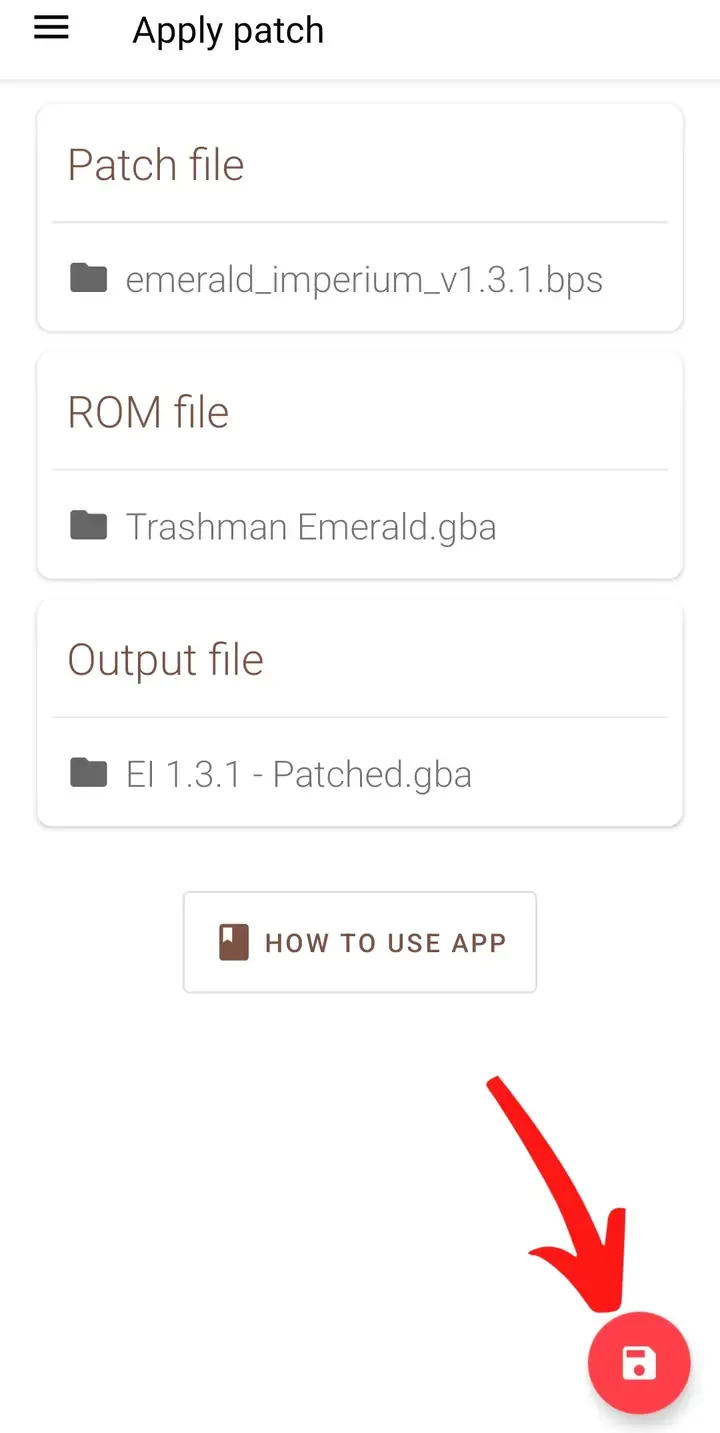
Review all three fields before starting. Patch file should show the downloaded patch, ROM file should show the required base ROM, and Output file should show a separate destination with the right extension.
Tap the red action button
Tap the red round action button in the bottom-right corner. UniPatcher reads the two inputs and writes the patched result to the destination you selected. Keep the app open until the process finishes.
Step 6
Confirm that patching completed
Wait for the completion message
Keep UniPatcher open until the Patching complete message appears. It confirms that the app finished writing the output file.
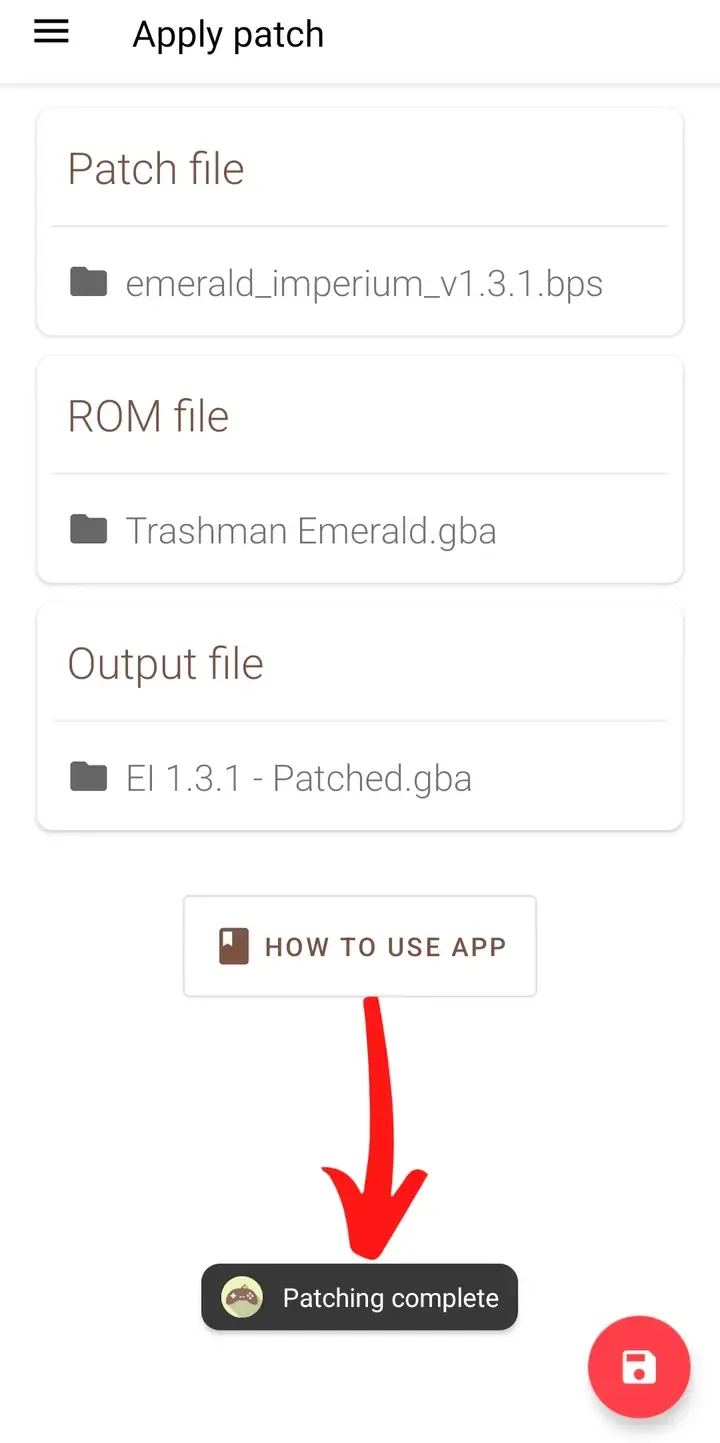
You can now open the new file in an emulator compatible with the original console. Keep the untouched base ROM as a backup.
If the patched game does not start, return to the patch project's instructions and recheck the base ROM region, revision, checksum and any required preparation. A successful write confirms that an output was created; it cannot guarantee that mismatched input files are correct.
Need to diagnose a mismatch or failed output? Use the focused troubleshooting checks.